The composition of the dryer usually includes a fairly large number of components, and absolutely any of them can fail. First of all, this type includes a thermal fuse and a switch. Some time ago, it was broken dryers that were the main cause of fires in people’s houses and apartments. Those terrible times are in the past, because now both parts are working on fire prevention.
This article will discuss some common failures of the thermal fuse located on the fan wheel, as well as on the block. We will discuss options for solving problems.
Faulty thermal fuse on the fan wheel
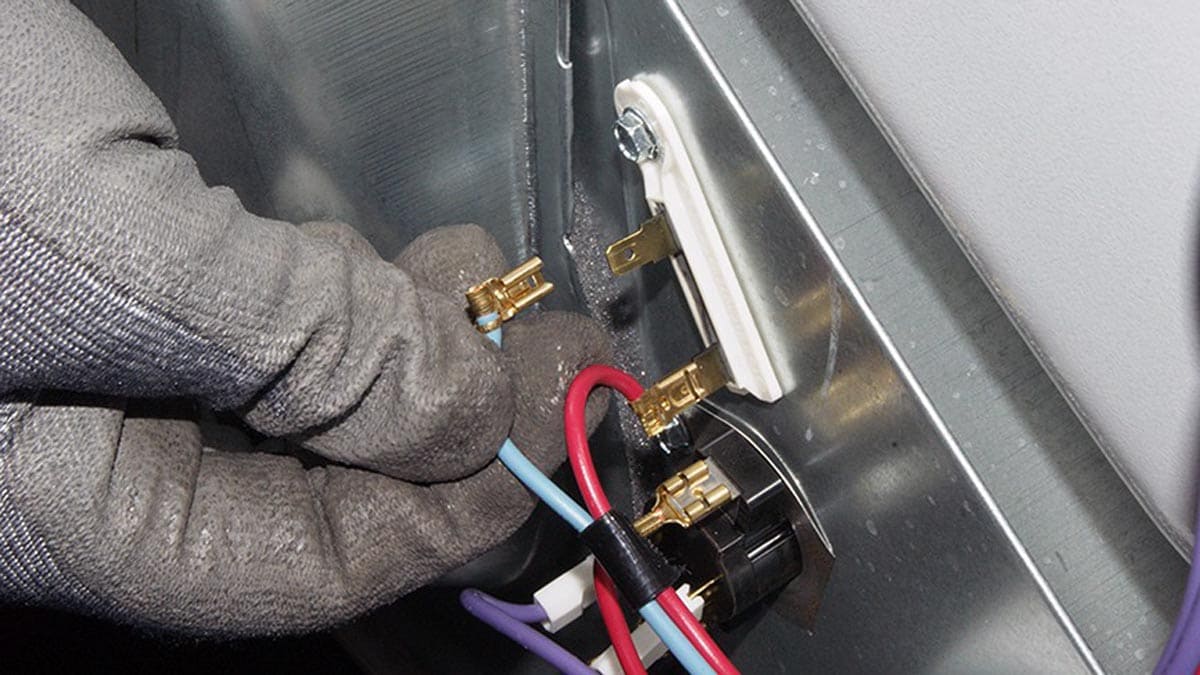
As you might guess from the name of this unit, it is located on the system fan and is responsible for temperature control. When it becomes excessively high, the power to the motor is deactivated, but not the heating element. Diagnosing a fuse that has blown is easy. All you have to do is check for continuity in the area between the two pins. First you have to unplug the power cord from the wall. Only then can the system be started. Each dryer has its own disassembly procedure and fuse access scheme.
Relay failure on the control board
This is the most common problem, especially with Whirlpool and Maytag dryers. Most often, the relay is fixed in the “ON” position, as well as power is supplied to the heating element, ignoring the corresponding commands. All this leads to the fact that the control board always supplies power to the heating element while the dryer is running.
If the critical temperature is reached, the fuse blows. This usually happens at the end, namely within the refrigeration cycle. In this case, the user is required to replace the fuse, as well as the entire control board due to a stuck relay.

The procedure for checking the control board can be described as follows:
- first, the device is completely disconnected from the network;
- further, all screws that hold it in one place are removed from the rear panel;
- it turns over to gain access to the board;
- it is important that the switch is located exactly on the bottom right;
- it is necessary to check for the presence of melting or black marks, which indicate a breakdown;
- if something is suddenly not visible, the replacement must be done anyway.
Lining the fuse
Sometimes it happens that the lint simply bypasses the trap that was intended for them and ends up in the wrong places inside the machine itself. As soon as they have the opportunity, they usually wrap themselves around the fan. As a result, the fuse overheats and even blows due to heat buildup.
If such a problem does exist, the user is required to gain access to the blower wheel and then clear debris from it. Subsequently, it remains to find the fuse and replace it. To simplify the search, you need to keep in mind that the blower is attached to the drive-type shaft motor.
Continued blowing fuse with heater assembly
The switch is usually located directly on the heater assembly. It is responsible for temperature control of the dryer and assists in monitoring the amount of heat that the dryer generates. If suddenly the user detects the rotation of the drum, and at the same time it does not produce heat, it may be the switch.
Among other things, the user may notice that his dryer is producing too little heat, which is simply not enough to fully dry the clothes. You can fix the problem by checking the electrical continuity. You will also need to determine the cause of the failure.
Below are the most common reasons why a fuse blows.
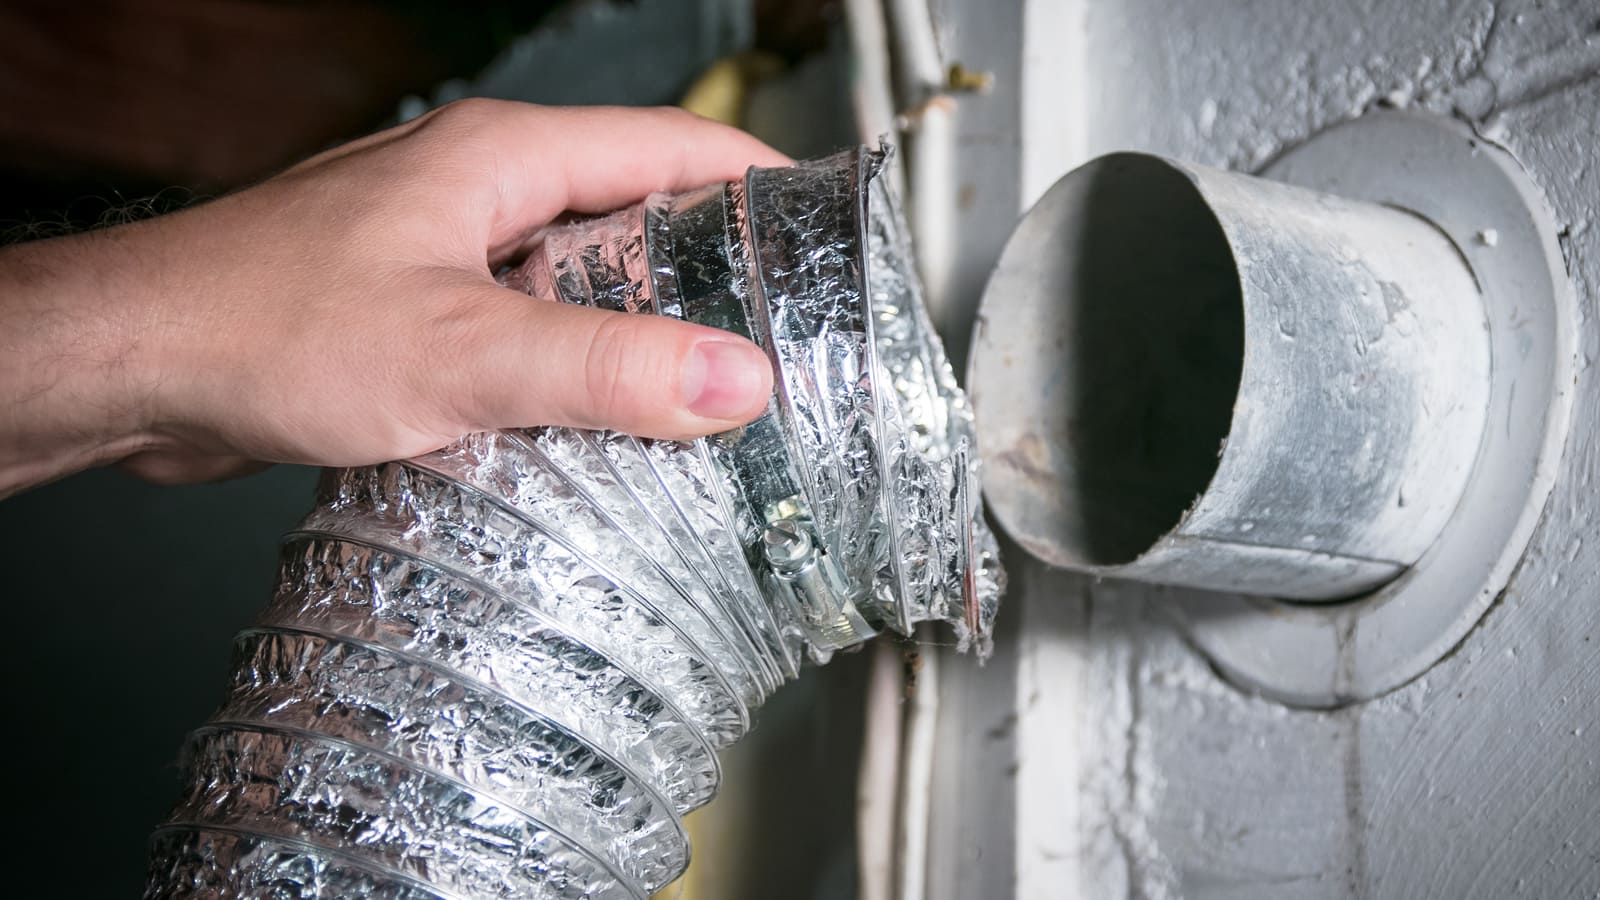
Clogged hose related to dryer
In case of blockage, as well as breakage of the ventilation lines, obstacles are created for the optimal circulation of the air mass, which can cause the dryer to overheat. This reason is considered the most common. All that is required of the user is to simply remove the line from the dryer and start cleaning it. The easiest way to do this is shown in the instructions below:
- deactivation of the device from the power source;
- search for a ventilation hole located on its rear panel;
- removal of clips or tape attaching holes to the dryer;
- moving the dryer aside to free up space that will be needed for further work;
- disposal of the air duct from dust and dirt from the inside of the ventilation hole;
- find a ventilation hole already outside the house or apartment, it will not be difficult to get access to it after removing the damper or air duct cover;
- cleaning absolutely the entire line, which will take time, but it’s worth it.
As soon as the user makes sure that all the villi are removed, he needs to connect everything again.
Grounding the heating element
If the coils expand in it, there is a possibility that they will touch the metal case, which can cause the heating element to be grounded. If this does happen, it remains in a permanently on state, even during the whipping or air cycle. All these circumstances cause the dryer to overheat. For this reason, the thermal fuse is triggered.

To solve the problem, follow the guide:
- first, the machine is disconnected from the network;
- then the rear panel is removed;
- the heating element is located below, it will be necessary to disconnect the wires that lead to it;
- you need to note the location of each wire in order to later remember exactly where it leads;
- it remains to remove the thermostat and transfer it to a new heating element, screwing it into place;
- carry out the change of wires and rear panel;
- connect to the network and check the system for correct operation.
Each time the fuse is triggered, it must be replaced, since the part is disposable and is not intended for repair.