All sorts of gadgets and electronic assistants help us not to fall out of the modern pace of life. Therefore, the failure of one of them can greatly complicate life. Especially when it comes to a washing machine. In some cases, the washing machine stops drawing water or draws little water. This happens for several reasons:
- the water tap is closed or the pressure level in the system is low;
- there is a blockage in the water supply valve;
- the water supply valve is out of order;
- broken or clogged pressure switch;
- the timer failed or the control board burned out.
Let’s take a closer look at each of the reasons from this list.
Closed water tap or low system pressure
Before you start disassembling the washing machine in search of faults, it is worth eliminating the simplest causes. First of all, check the water valve, it must be in the on position. Otherwise, water simply will not flow into the tank.
The next step is to check the pressure in the system. If the pressure level is too low, but the water in the washing machine will also not flow properly. The pressure may not be due to clogged pipes or the presence of gaps in the pipes. In this option, it is unlikely that it will be possible to cope without the help of a plumber.
There is a blockage in the water supply valve
If the water supply to the washing machine is very slow, it is worth checking the water supply valve for blockages. Often the filter screens become clogged with debris that prevents the normal passage of water. If the cause of the breakdown lies precisely in this, then you will not need to spend a lot of time-solving it.
Of the tools, you only need a simple flashlight, with which you can carefully inspect both holes for the water supply hoses. Each of them has a screen that is necessary to protect against debris from entering the washing machine. If these grids are heavily clogged, then the machine will not work correctly. Clean the screens and the problem will be solved.
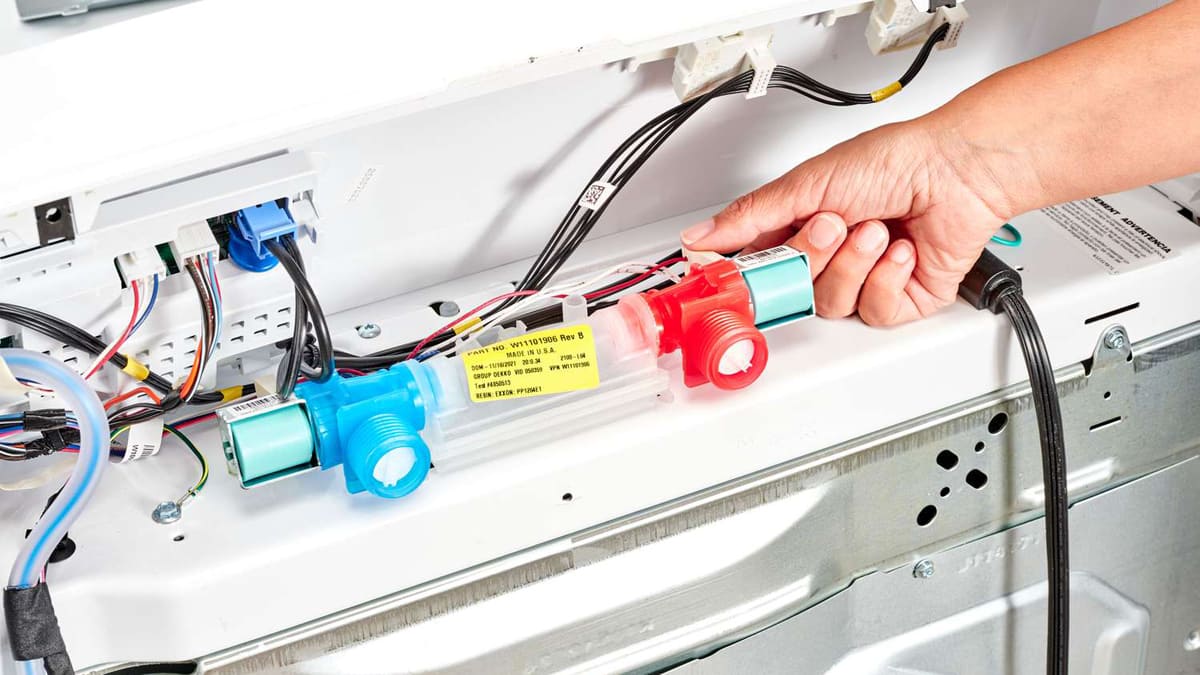
Faulty water supply valve
In some cases, the problem may lie in a broken water supply valve. To fix it, you will need to dismantle one of the panels. For a more precise location of the valve, please refer to the instruction manual.
When inspecting the valve you can see the wires going to the solenoid. They need to be disabled. In this case, it is necessary to remember the place of attachment of each wire in order to correctly install them after troubleshooting.
To check the malfunction, you can use a special device – a multimeter. It will allow you to determine the continuity of each terminal. If the example shows zero, then this indicates that the solenoid is defective and the valve must be replaced.
After that, you need to remove the inner tube that goes to the water supply valve. Now you can start installing a new serviceable part. After placing it, you can collect the washing machine back.
Broken or clogged pressure switch
If previous attempts to fix the problem have not been successful, then the next step should be to check the operation of the pressure switch. The location of this element depends on the specific model of the washing machine. However, in most cases, you should look for it inside the management console.
It is necessary to start troubleshooting by inspecting the pipe. So you can determine the presence of a blockage. If they are found, you should immediately get rid of the blocking.
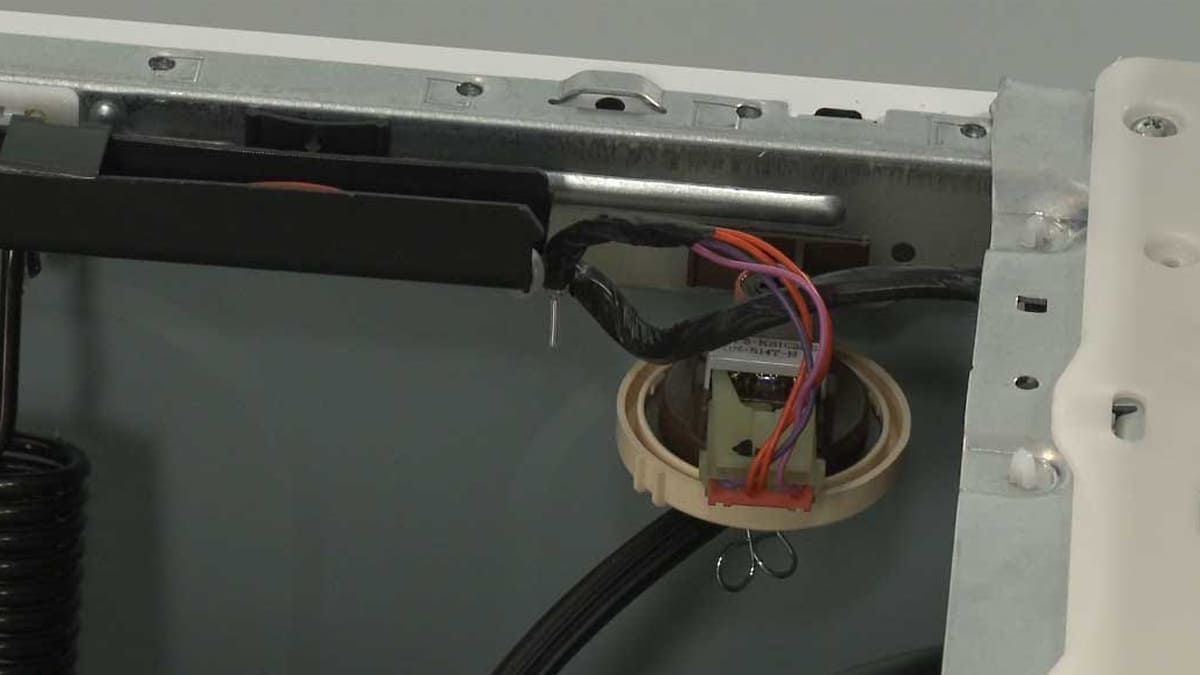
After that, you need to proceed to troubleshooting the water level switch:
- Using a multimeter, determine the performance of the part.
- Check each terminal.
- If the device shows zero, then the part can be considered faulty.
- Replace it with a working one.
Timer is out of order
The timer is necessary to notify the system that it is necessary to activate a particular cycle. When the part stops working normally, the machine will not fill with water, in some cases it stops working right in the middle of the cycle.
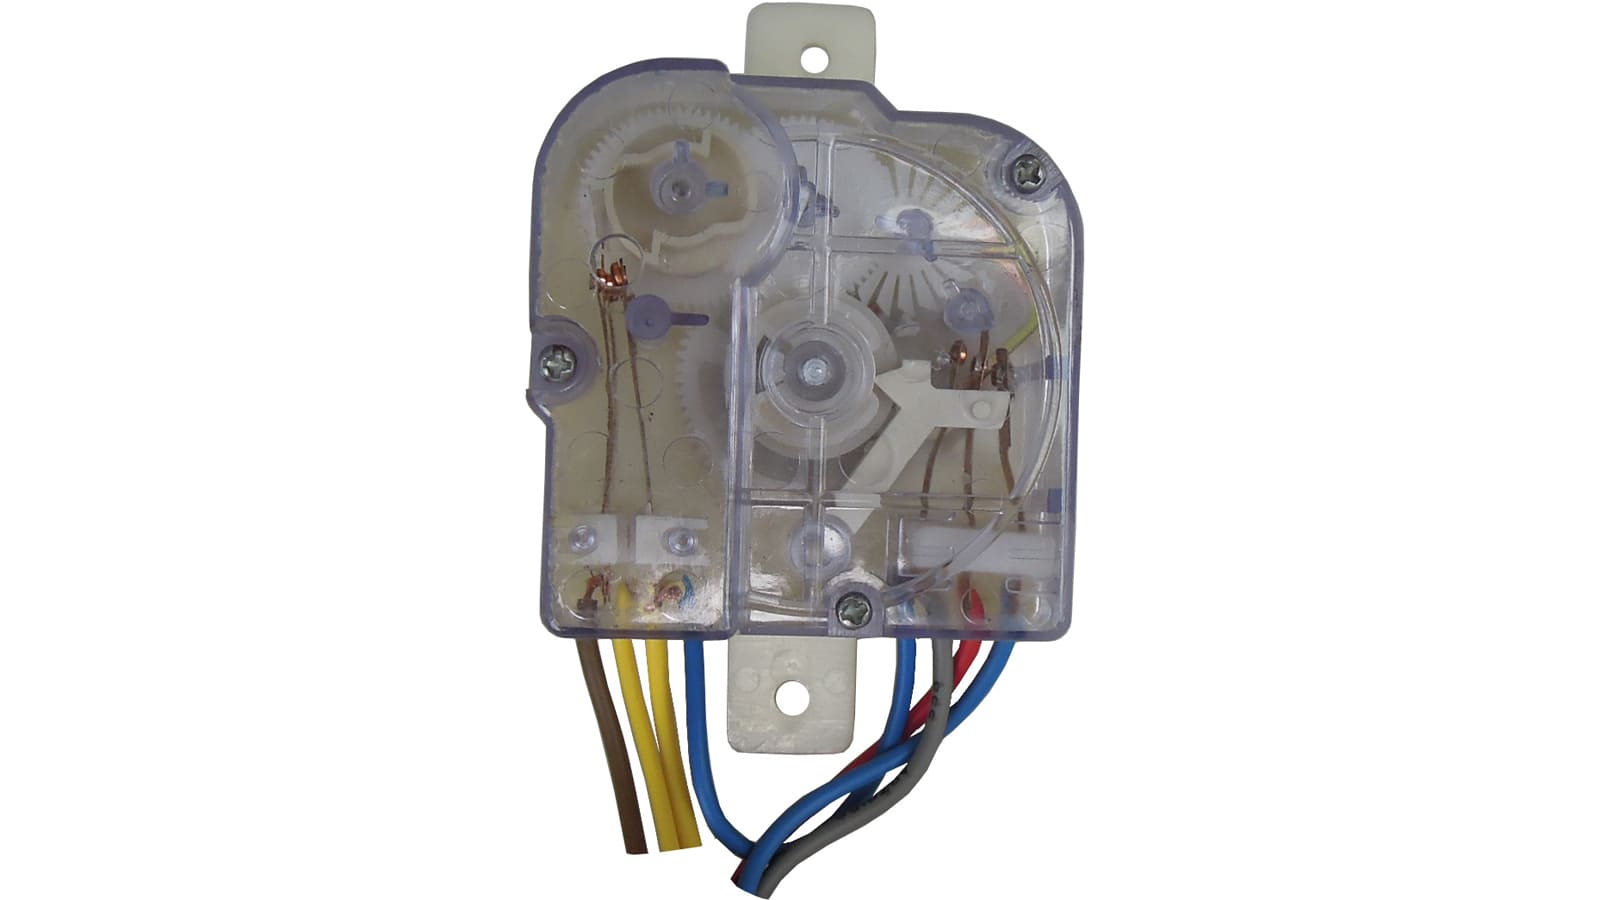
This element must be dismantled. To do this, follow these steps:
- Turn off the power to the device, and then remove the screws that secure the top control panel.
- Also disconnect all wires that go to the timer.
- The next step is to remove the screws that hold the timer.
- Next, determine the location of the timer shaft. Using a flathead screwdriver, pry it out of the socket.
- After that, it is tedious to remove the washer handle.
- Before replacing a part, it is advisable to check the continuity of the circuit. If the indicators indicate a lack of voltage, then a replacement of the defective part is required.
- Set a new timer and reassemble all previously disconnected items in reverse order.
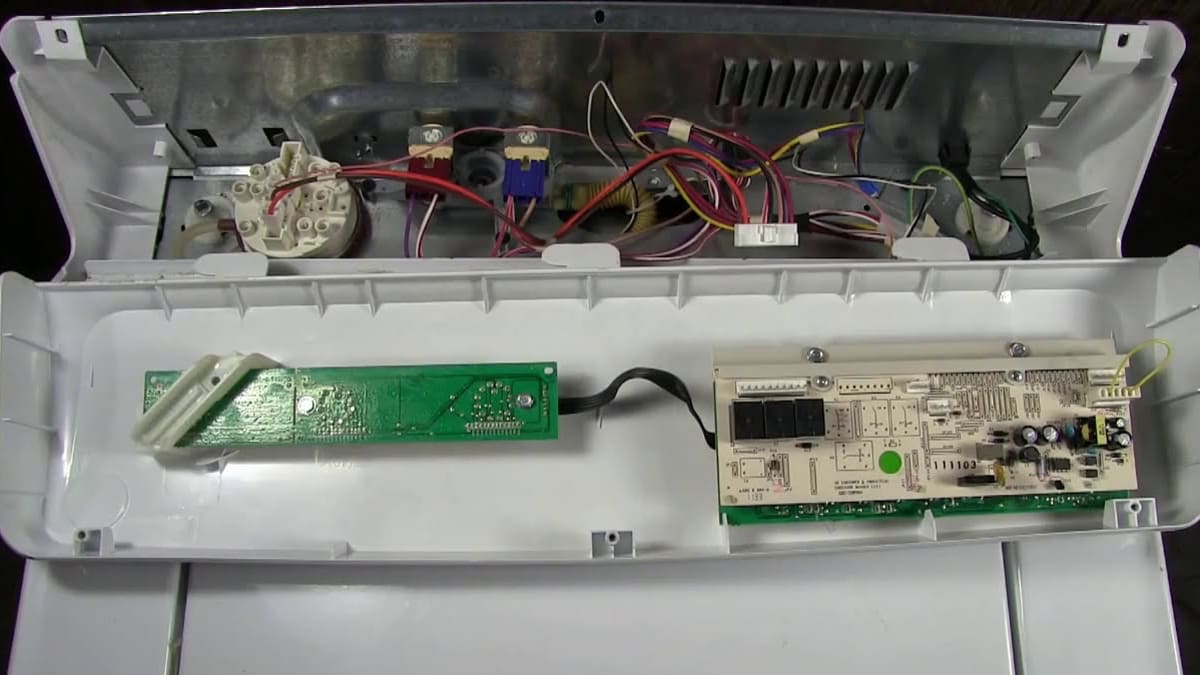
The control board burnt out
In some washing machines, the timer function is performed by the control board. Therefore, perhaps the problem lies in its malfunction. It can be quite problematic to independently determine the performance of this part. You can only determine some visual damage. To do this, you need to get to it:
- Disconnect the washing machine from the power supply. Simple safety precautions will help you avoid dangerous situations.
- Remove the screws that secure the rear control panel and remove it.
- After that, proceed to dismantle the block body.
- Before disconnecting all wires and fasteners, take a photo. Such foresight will facilitate the assembly process.
- Remove the assembly from the control housing and the old main control board from the display board.
- If damage and traces of a short circuit are found on the board, it is worth replacing it with a new one.