A Fisher & Paykel dryer can stop producing heat in the required amount if some of its elements are worn out or become faulty. The easiest way to overcome these problems is to take the technician to a master. However, if you want and have some skills, you can do it yourself.
Initial troubleshooting steps
If Fisher & Paykel does not heat up, it may not always be due to a component that has failed. Before disassembling an appliance and trying to fix it from the inside, there are some initial troubleshooting steps you need to take:
- Check the selected drying cycle: Fisher & Paykel has several possible drying cycles, and not all of them involve the use of heat. For example, the Cold Air cycle does not require heating;
- Drain the water: condenser models are equipped with a water reservoir. This is where all the moisture that has been removed from the clothes in the drum collects. When the tank is full, the dryer stops generating heat. Once you have drained all the liquid from the reservoir, the problem is resolved;
- Clear ventilation openings: the ventilation openings of the dryer can sometimes become clogged with small particles of dirt. Operating the dryer in this case can lead to overheating, which in its own way can cause serious damage. To protect ourselves from these effects, Fisher & Paykel will stop generating heat. You can solve the problem by cleaning the holes from dirt.
If these simple steps did not solve the problem, then the equipment is broken and needs to be repaired.
Caution
The tumble dryer, like any other equipment, should not be opened until it has been disconnected from the power source. If the equipment is powered by gas, then its supply must be turned off. This will protect you from electric shock and reduce the risk of injury of other origin while working with the device. If you are not sure that you can perform the repairs efficiently and safely, it is better to seek help from a qualified technician.
Blown fuse or tripped switch
The power supply to the tumble dryer is protected either by a fuse (if the appliance is plugged into a socket) or by a circuit breaker (if plugged into the mains). Whatever their connection, these devices pursue the same goal: disconnect power to the dryer if there is a risk of damage or fire. But they work in different ways.
A fuse is a sacrificial device that, having done its job, will burn out and need to be replaced. The switch will ultimately remain intact, it is enough to switch it to the on mode. A blown fuse or a tripped switch is the result of some more serious breakdown. So if these parts fail repeatedly, you need to find the problem in the dryer itself.
High limit thermostat
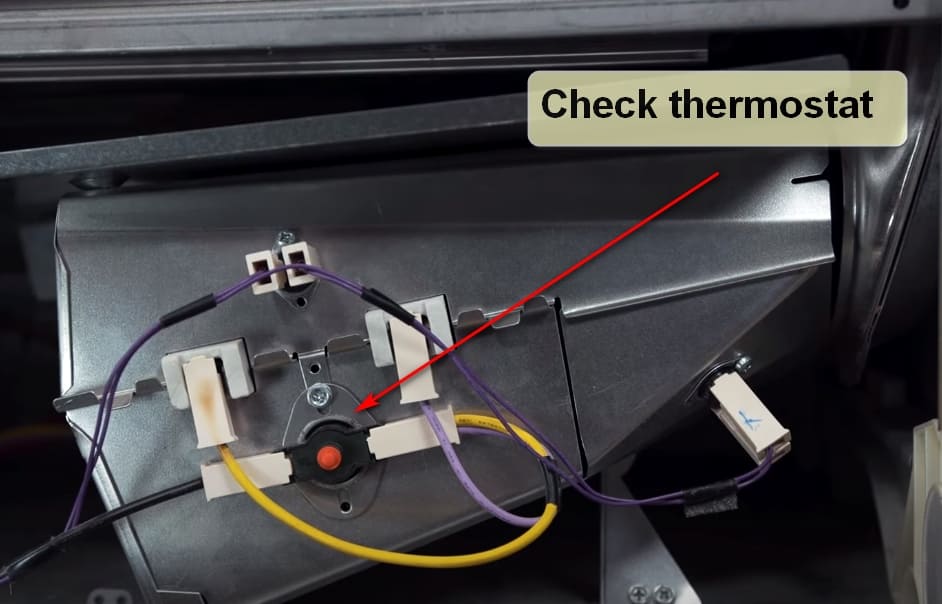
The high limit thermostat is an overheating protection device. Most often it is placed next to the blower housing.
The high limit thermostat is a switch that too high temperature can activate. If the temperature inside the device becomes too high, the thermostat breaks the electrical circuit of the device and prevents it from continuing to heat up.
If the thermostat is working properly, it will only break the electrical circuit at the moment of need, and in this case, you need to deal with overheating problems. However, if the thermostat malfunctions, it can turn off the heating even when it is not worth doing. In this case, the thermostat needs to be repaired, but given its inexpensive cost and the complexity of the device, it is better to just limit the replacement.
The thermostat can be accessed by removing the rear panel of the dryer. Having found it, you need to disconnect the electrical connector attached to it. The thermostat is held in place by screws, by unscrewing which devices you can remove it.
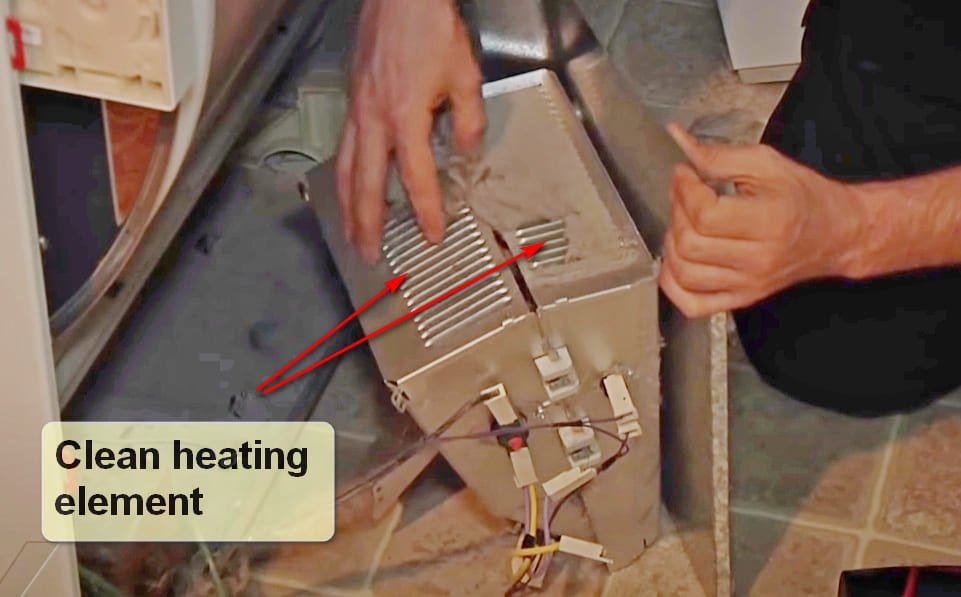
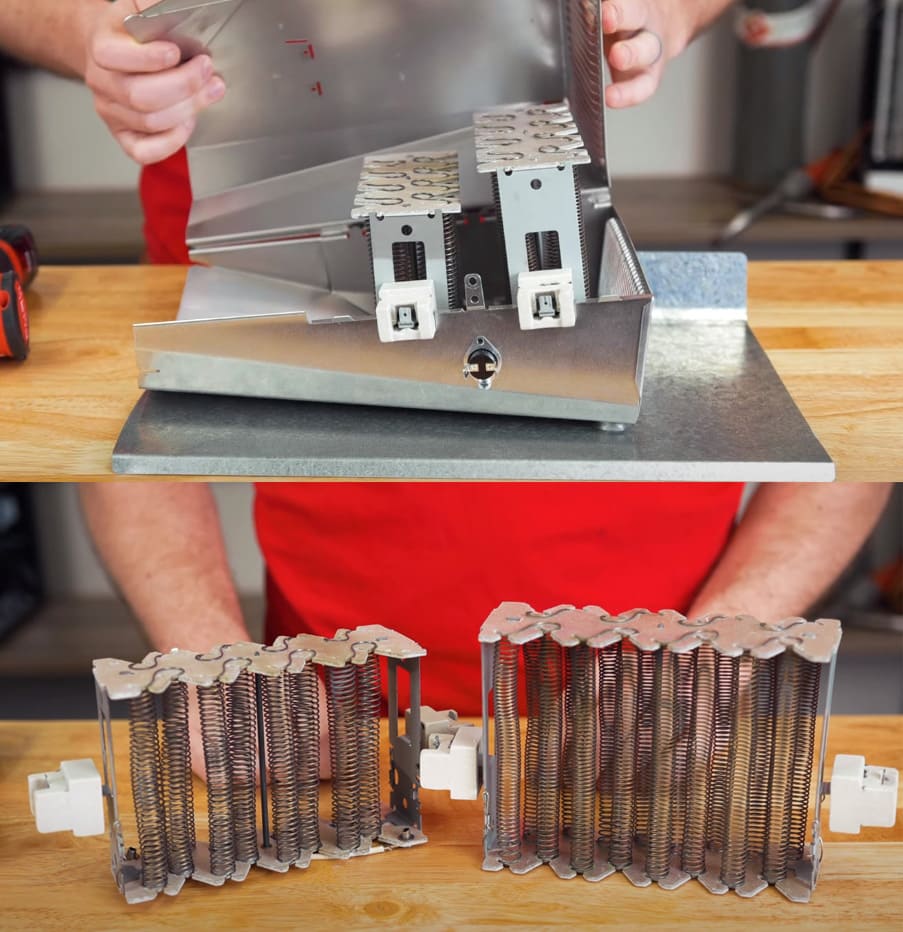
Defective heating element
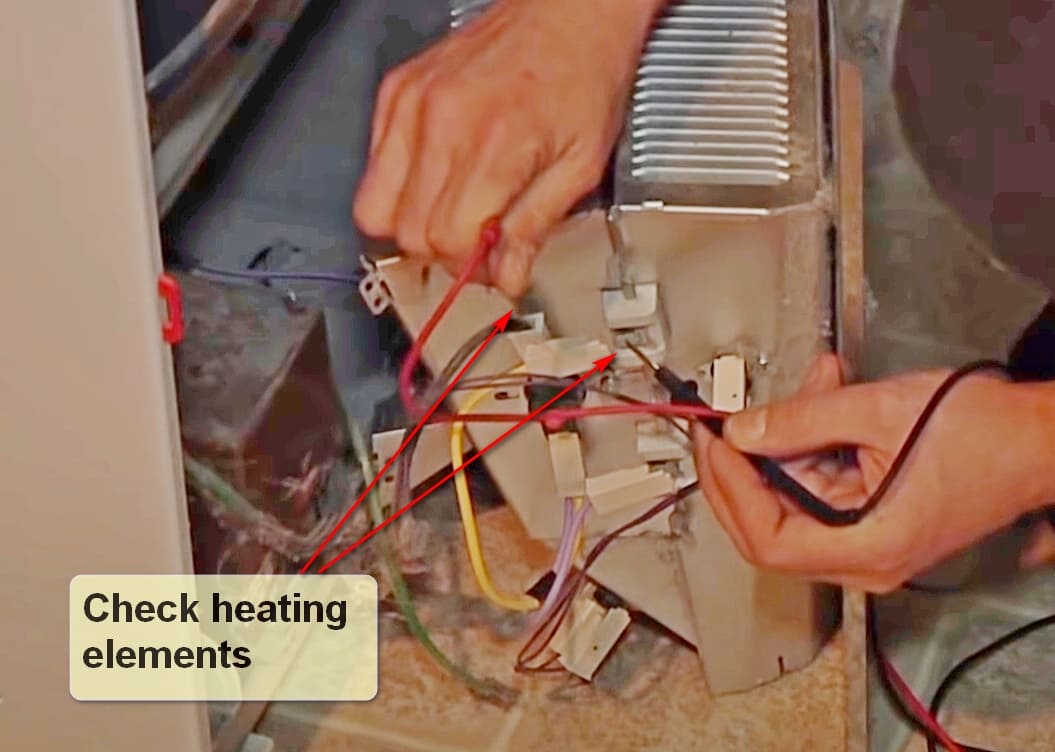
The dryer must be able to reach a certain temperature in order to produce warm enough air to dry clothes. The heating element is responsible for this. This device consists almost entirely of wires that conduct electricity and create resistance to current. The moment power is applied to the heating element, the wires begin to quickly and strongly heat up. The resulting heat will be driven by the fan through the drum. This is how moisture is removed.
Heating elements wear out over time. Some of them can burn out or break and, as a result, stop generating the heat necessary for drying. In this case, the simplest and most effective way to fix it would be a complete replacement of the entire heating element.
This is not difficult to do: you need to remove the back panel and find the heating element. Next, you need to disconnect all electrical connectors and remove the mounting screws. After that, all that remains is to fasten the new heating element to the screws, connect the electrical connectors to it and close the rear panel of the dryer.
It should be noted that all elements of the dryer and their locations are described in the user manual. If you do not know what the desired element looks like or simply cannot find it, just study the information.
Defective engine control module

The motor control module is responsible for powering two components: the dryer motor and its heating elements. Depending on the stage of the dryer, it activates one of them.
Malfunctions in the ECM can result in motors or heating elements simply not receiving the power they need. This problem is usually caused by one of two reasons: general wear and tear of the equipment or electrical damage (for example, due to a power surge).
For repair, it is enough to replace the failed control module. Usually this module can be found in the lower left corner of the instrument. You can get to it by removing the front cover of the dryer. Unscrew the fixing screws, disconnect all connected wires. Insert a new one in place of the old module, attach it with screws and connect the wires. Finally, return the front panel of the dryer.
If, when disconnecting the wires, you are not sure that you can return everything as it was, take a picture of them in advance, and if you suddenly get confused, you will be able to navigate the existing images.