If the clothes dryer starts to turn off, you need to urgently find the problem and fix it. In some cases, this is due to a blockage in the condensate drain hose or an overflow of the container under it.
But there are other reasons why the dryer turns off after a few minutes of operation:
- Dryer motor overheating:
- Faulty door latch or switch.
- Disconnection or oxidation of the humidity sensor wires.
- Damage to the drum belt.
- Broken tension roller.
Next, we’ll talk in more detail about each of the reasons why the dryer constantly turns off.
Dryer motor overheating
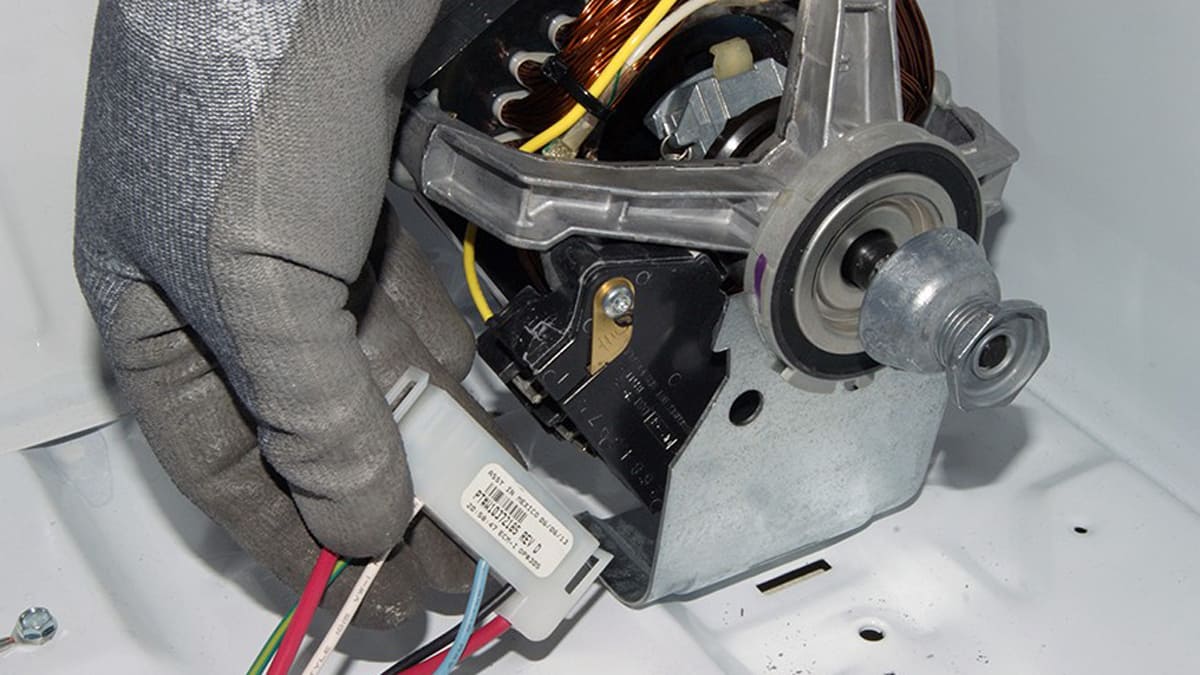
The dryer motor is often the reason for its forced shutdown. Engine failure is possible for various reasons, including as a result of natural wear and tear. When its resource is almost exhausted, a buzzing sound begins to emanate from the machine.
How to make sure that the cause is in the engine? The next time the machine turns off, wait 30 to 60 minutes. If the engine restarts on its own after a 2-5 minute cool down period, then the problem is with the engine.
How to replace the motor:
- Unplug the machine from the socket.
- Remove the bottom access panel (if present).
- Remove the fluff filter and screws underneath.
- Remove the top panel.
- Disconnect the wires going to the door switch.
- Remove the front panel from the dryer.
- Grab the idler pulley with your left hand. Push it back, then remove the belt from it with your right hand.
- Remove the idler pulley from the mounting bracket.
- Grasp the drum and remove it without removing the belt.
- Disconnect the wires going to the motor.
- Loosen the fan wheel.
- Install a new motor and assemble dryer parts.
If you do not have practical experience in such work, it is better to contact the service center. Otherwise, you do everything at your own peril and risk.
Door latch malfunction
The tumble dryers are equipped with door switches that disable operation if the door is open. Manufacturers strictly forbid blocking the action of the safety switches and start the machine with the doors open.
If the door latch fails, the electronics will notify that the door is open. The machine will not start. Replace latch. To do this, follow these steps:
- Turn off the power to the equipment.
- Open the door, and take it off the hinges.
- Unscrew all elements holding the door.
- Separate the two halves of the door.
- Remove the door latch with pliers, and install a new latch.
- Reassemble the dryer door in reverse order.
Connect the machine to the network and start it up. The problem should be gone.
Humidity sensor wiring problem
Dryers are equipped with a humidity sensor. He is responsible for controlling the moisture inside the drum, when it is low, he stops the technique, a notification appears that things are dry and they can be pulled out.
A problem with the sensor wires causes the control board to stop receiving a signal from it. As a result, the machine stops after 5 minutes of operation. Automation “thinks” that the drying cycle is completed, but in fact things remain wet.
To replace the humidity sensor wires with your own hands, follow these steps:
- Disconnect household appliances from the mains electricity.
- Turn the dryer with the back facing you.
- Loosen the screws that hold the top.
- Pull back the top slightly, lift, remove and set aside.
- Disconnect the wires from the control board.
- Remove the screws that secure the control panel.
- Remove the control panel, disconnect the remaining wires, and set it aside.
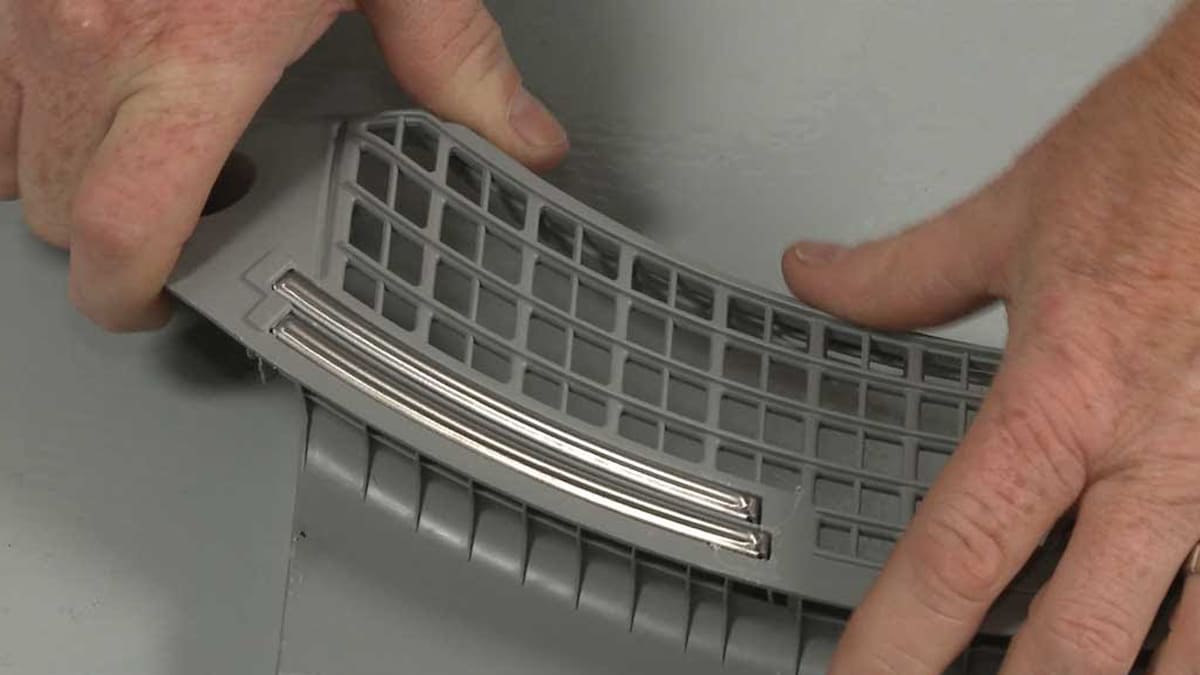
- Open the dryer door, and remove the lint screen housing by unscrewing the fasteners. It is attached to the front panel. Close the door.
- Take the pliers and use them to bend the latch that holds the front panel. Then unscrew the screws that hold the panel.
- Pay attention to the door switch. Disconnect it, remove the panel and set it aside. You should see the humidity sensor wiring harness. It is located on the right side. Disable them.
- Using pliers, remove the mounting plate, then remove the strainer.
- Remove the grate.
- Pull out the fluff filter guide.
- Remove old wires, and connect new ones.
Assemble the car in reverse order. Connect to the network and check how the equipment works.
Drum belt problem
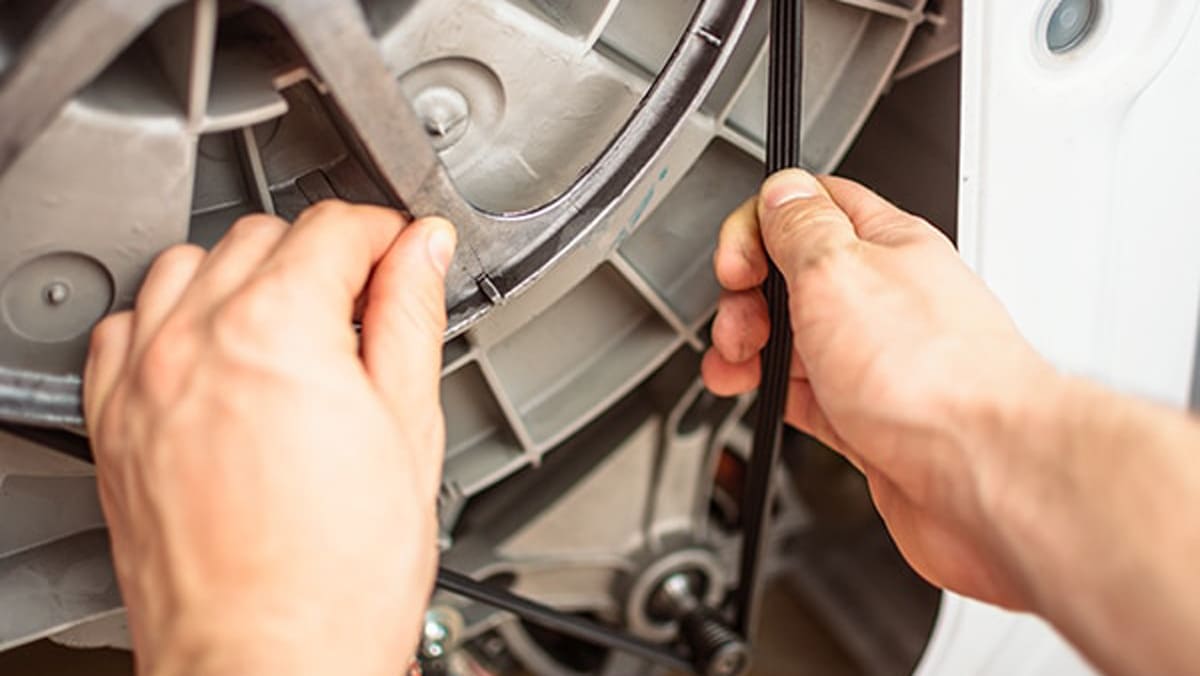
If you turn on the dryer and it stops after a few minutes, pay attention to the drum belt. It runs around the drum, idler pulley, and motor pulley. Its function is simple – to transmit rotation to the drum from the armature of the engine. The engine is driven, and pulls the belt, which in turn, due to the friction force, rotates the drum, inside which the clothes are located.
If the drum inside the dryer is not moving, the belt has broken. You can understand this by the silence that comes from the dryer after it is started. When the drum is spinning, you can always hear it.
The belt breaks due to natural wear. It needs to be replaced, otherwise, the car will not be of any use. You can do it yourself by following the instructions below.
- Unplug the power cord from the socket.
- Remove the top and front panels.
- Remove the belt first from the tension roller, and then from the engine pulley.
- Pull the belt up to release the drum bearing.
- Remove the front guide.
- Slide the drum forward through the hole to remove the belt from the back of the drum.
- Fit the new belt, and wrap it around the drum (the groove on the belt should be where the drum is).
- Slide the drum back, lift it up, then place the tumbler shaft into the rear bearing.
- Adjust the belt so that it lies flat, then pull it through both pulleys.
- Loosen the tension roller to tighten the belt.
Reassemble the machine in reverse order and check its operation.
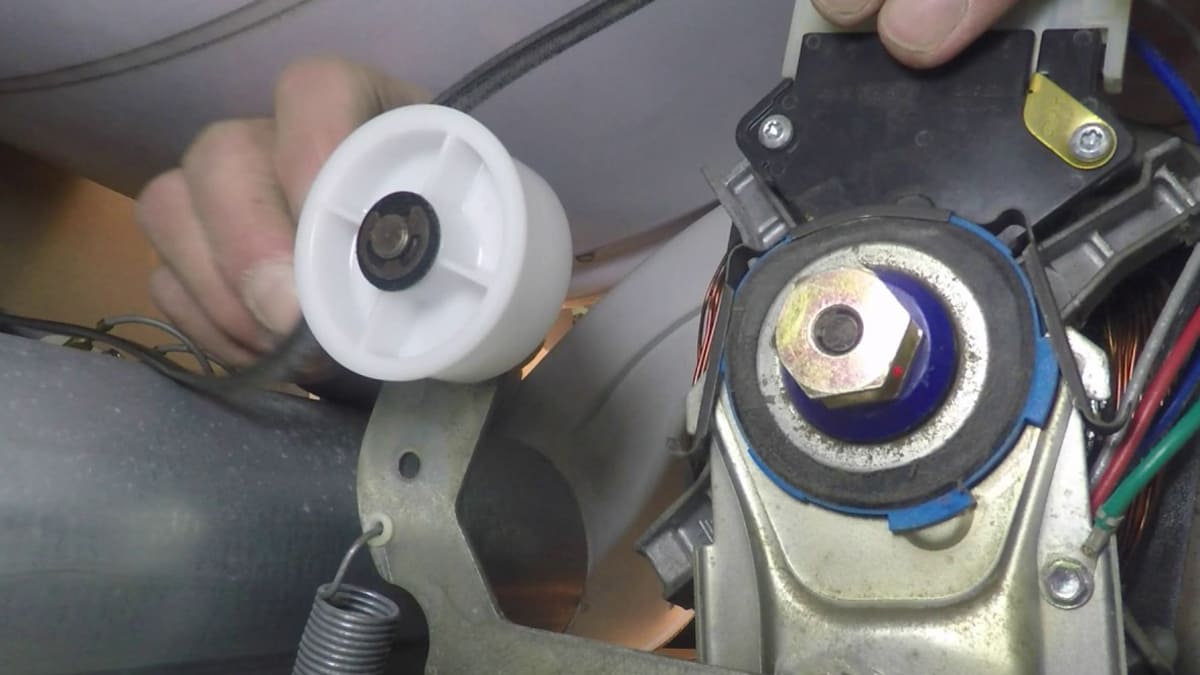
Idler pulley problem
If everything is fine with the belt, the drum is spinning and things are drying, but only for the first 5 minutes, you need to pay attention to the tension roller. If it is damaged, the belt will slip. The drum will not be able to spin inside the machine. Things will stay wet. At the same time, the automation will give a signal that something is wrong and stop the dryer.
To get to the tensioner pulley, turn off the machine and follow the same steps as described in the instructions for replacing the belt. As soon as you get to the tension roller, carefully inspect it for damage. If they are, the roller will have to be replaced. In any case, it will not provide sufficient belt tension. The drum will remain stationary.
After replacing the idler roller, the dryer should work as before. But if this does not happen and the problem persists, contact the service center. If you are not sure that you can handle it on your own, leave the repair of the machine to professionals.