Samsung dryers are considered among the best in the world. But even they are not eternal and over time they begin to cause inconvenience, for example, they stop starting. There are several reasons why this is happening. And we will consider the most common of them in this article.
Reasons Why Samsung Dryer Won’t Start
Most often, the cause is associated with a breakdown inside the equipment. Its elimination requires proper qualifications. It is better to entrust the work to the specialists of the service center, if there is no confidence in their abilities.
The dryer does not start, reasons:
- Breakage of the tension pulley on which the drive belt is attached.
- Worn drum belt.
- Defective idler microswitch.
- Engine failure.
- Blown thermal fuse.
- Broken door latch.
In addition to serious breakdowns, a problem with starting the dryer can occur due to the negligence of the owner of the equipment. Read more about them at the end of the article.
Disconnect the tumble dryer from the electrical outlet before performing diagnostics. Start by checking the door latch to make sure the door locks securely in the closed position. If everything is fine, move on to other problems. If the machine was working and suddenly stopped, after which it does not start, let it cool down and try to start it again.
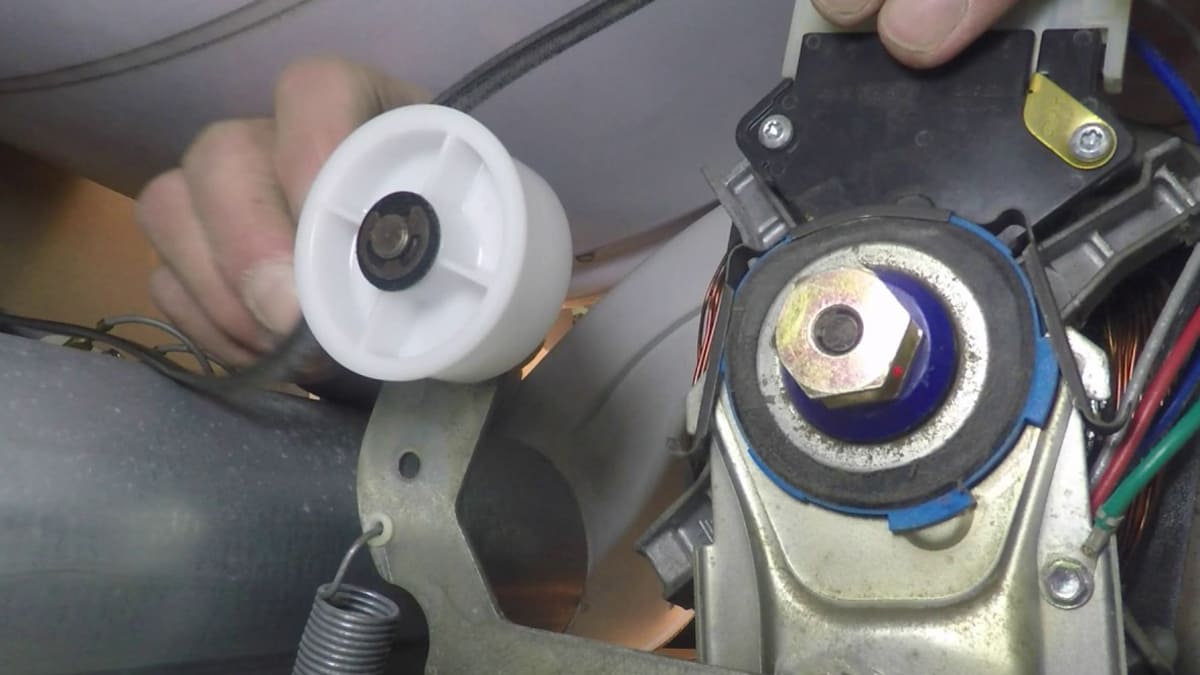
Idler pulley failure
The drum cannot rotate by itself. It is driven by the engine through a system of pulleys and belts. The belt must be well tensioned, not sag, so that the drum rotates at a given speed. The belt should not be worn out, its condition must be periodically monitored.
Over time, the pulley wears out and fails. After that, the dryer will not start because it will still not be able to perform its function. The pulley resembles a reel of film, only the drive belt acts as a film.
Replacing a broken idler pulley is a difficult task for a beginner, but quite feasible. You need to look at the instructions for household appliances to see its location, and then gain access to the pulley, dismantle the tension belt, and then the pulley itself and replace it with a new one.
Drum belt wear
Drum belt wear is another reason why the dryer stops starting. This belt transmits torque from the engine to the drum. It is made of rubber and has a certain degree of tension. Over time, it begins to fray, sag, after which errors appear in the operation of the equipment and its failure.
If the old belt is still wrapped around the moving parts, press the idler pulley to release it. During work, be careful not to hurt your fingers.
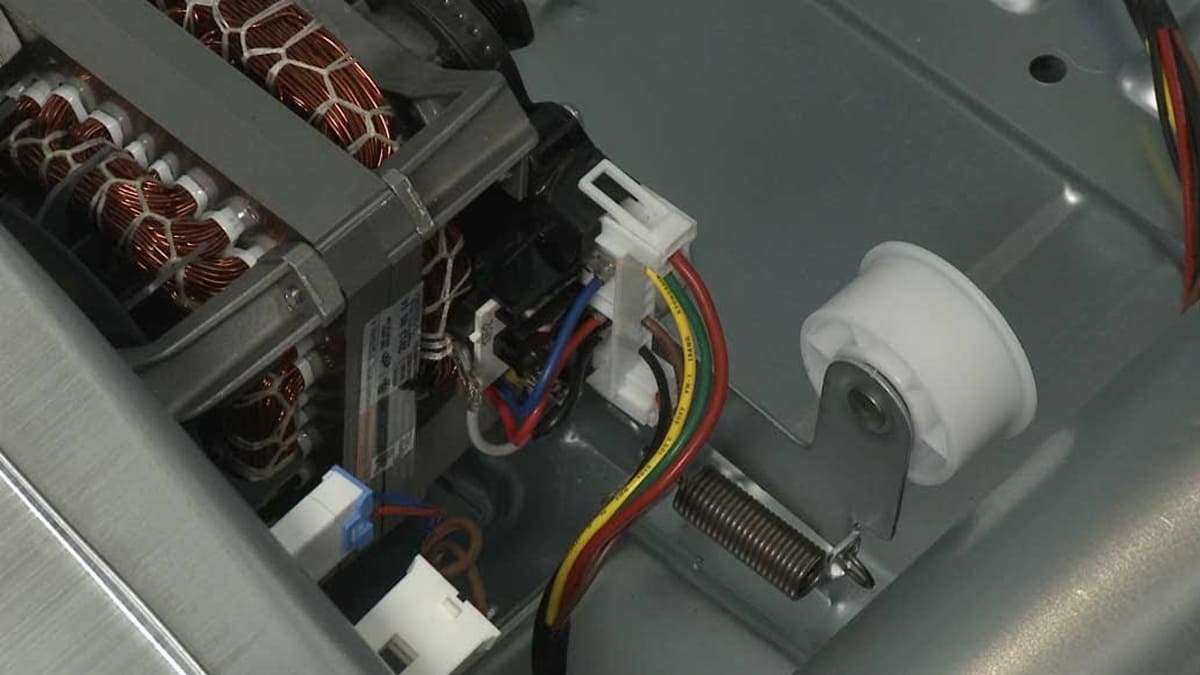
Idler microswitch failure
The microswitch is located in close proximity to the motor. It signals the dryer when the drive belt breaks. In this case, the electrical circuit will be broken and the engine will not start.
A microswitch is an electrical device that is physically actuated. Its components wear out over time and it breaks down. Its service life is also reduced due to regular exposure to moisture, which leads to corrosion or a short circuit. If the microswitch does not work, the machine will not start.
Idler pulley microswitch is easy to replace, harder to get to. To understand how to access the element, see the instruction manual for household appliances. You may need to remove the motor housing, belt and pulleys. Once you get to the microswitch, unplug the electrical connectors and remove it. Install a new one in its place and make the necessary connections.
Engine malfunction
The engine is the main component of the dryer, without which it cannot work. It creates a torque that is transmitted to the drum through a system of pulleys and belts. During the operation of the engine, a slight noise occurs, it should not strain. Usually it’s a soft buzz.
The engine is subject to wear, as is all equipment with moving parts. If the machine stops starting, the starting winding may have burned out at the engine. In this case, there will be a hum and nothing more.
Replacing an engine is a complex task that must be performed by qualified personnel. Contact a service center that specializes in repairing Samsung appliances, explain the problem and find out when you can bring the machine in for repair. In the service, sign a contract, specify how long the repair will last. When the time comes, call the service to find out the details.
You can replace the motor yourself if nothing bothers you. Turn off the power, remove the panels, get access to the power unit, see how it is fixed. Disconnect all current-carrying elements connected to it, dismantle it by unscrewing the retaining bolts. Take photos as you work so you don’t mix up anything when connecting a new engine.
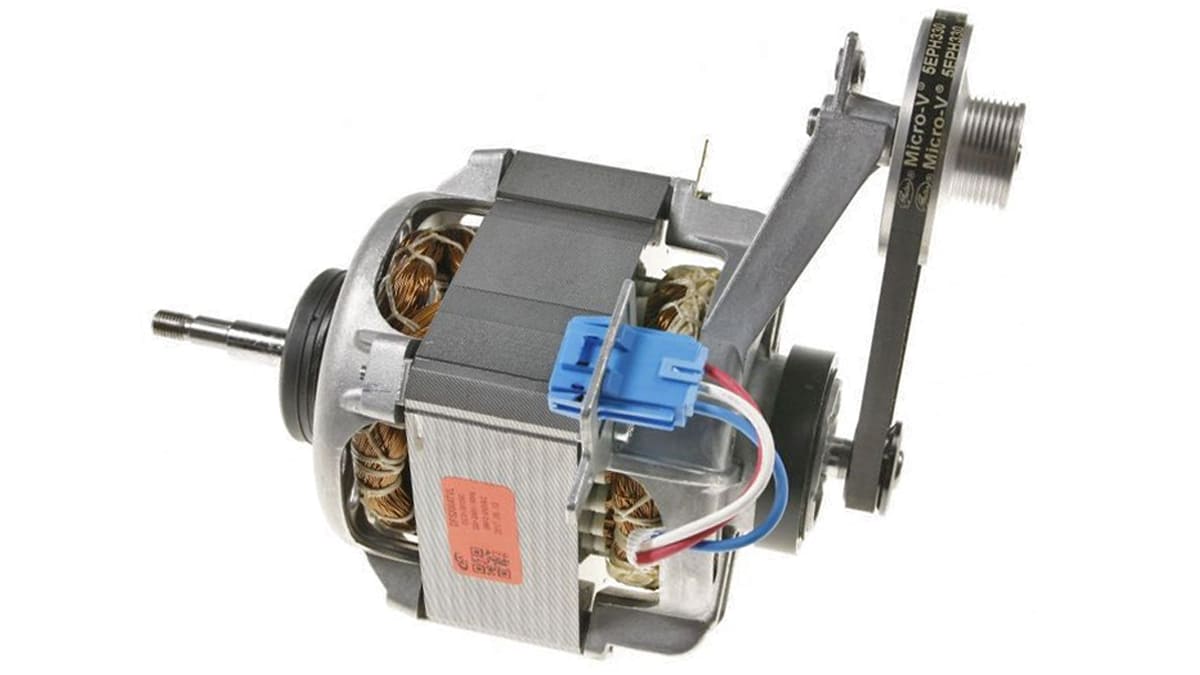
When replacing the engine, you will have to remove the fan impeller, air duct, belt, pulleys, drum. The task is difficult, you do everything at your own peril and risk. Record your every move or videotape it so you can put it all back together later. Reassembly is constantly accompanied by errors.
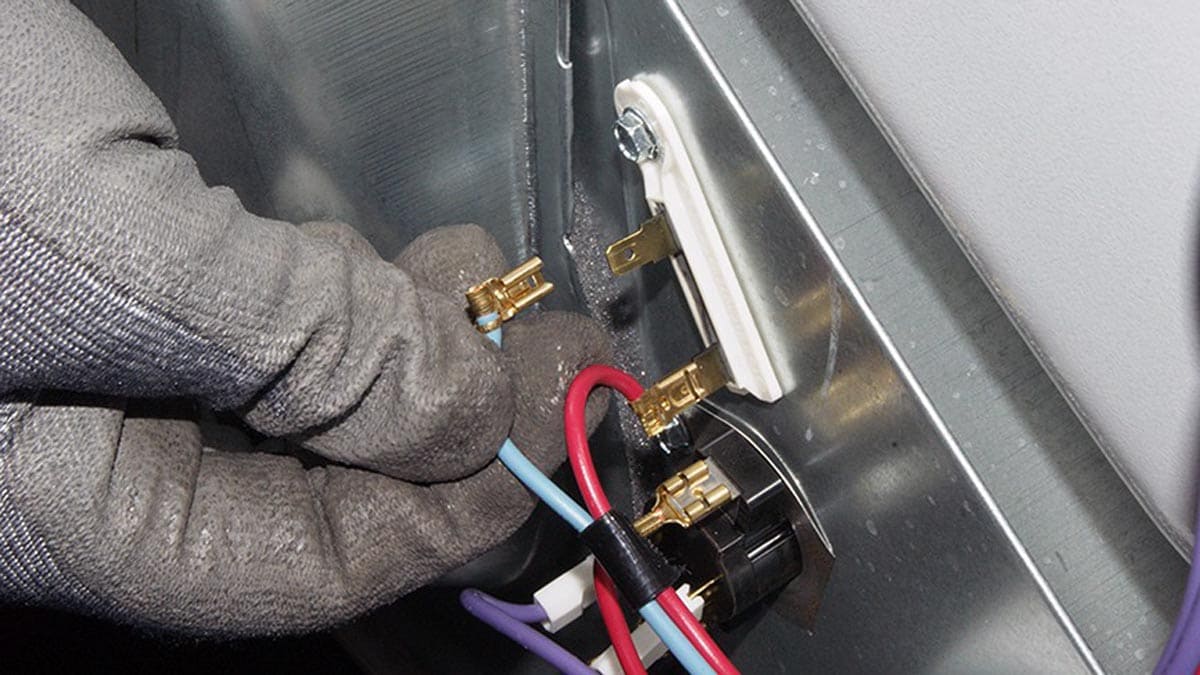
Thermal fuse blown
The thermal fuse is located on the fan housing. It works when the temperature inside the machine reaches critical values. If it burned out, you need to find out the reason why the machine heats up too much. This is usually due to clogging of the vents with dust and dirt. When they are clogged, heat does not escape, so after a while the thermal fuse works and opens the circuit.
The thermal fuse may be blown due to a clogged lint filter. Clean it, wait until the machine has completely cooled down, then start it. If it does not turn on, replace the fuse or contact the service center.
The lint filter must be cleaned after each drying.
To clean the filter, remove it from the holder in the door and open it. To do this, press your thumb on its edge. Clean the fluff from all sides with your hand or a soft cloth. Use detergent and sponge if necessary. Dry the filter, close and insert into the holder in the door.
To replace the fuse, open the dryer, reach the fan housing, remove the element and insert a new one into the electrical socket. Along the way, clean the vents if they are clogged.
Broken door latch
When the door closes, a special sensor sends a signal to the control module, after which the drying process starts. Until the door is completely closed, the machine does not start. Over time, the door latch breaks or the door itself warps, as a result of which it ceases to fit snugly against the body and be fixed in the locked position.
Unscrew the door latch and screw a new one in its place. Close the door and check the degree of its fixation.
These are the main reasons why the Samsung brand dryer stops starting. But sometimes there are funny cases when the owner simply forgets to plug in household appliances.
After loading the laundry, do not forget to select the program and press the start / pause button, the technician will not do anything on its own. Also check if the child lock is turned on and if the “Start delay” option is activated. To turn it off, hold down the Stop button for 3 seconds.
We recommend contacting service centers to repair equipment in order to avoid undesirable consequences from improperly performed work. In this case, you will also save yourself the trouble of searching and selecting spare parts. Sometimes this is very difficult to do, and out of ignorance, you can buy the wrong spare part.
To extend the life of household appliances, follow the requirements specified in the instructions. Maintain the dryer in a timely manner: clean the filters, vents, etc. If the dryer is not connected to a separate drain, empty the condensate container after each drying. Take it out and drain the water that has accumulated there. Check the condition of the capacitor. Clean it at least 3 times a year. Rinse the plates with a small amount of water. Remove fluff from the channel before the condenser and from the compartment below it.