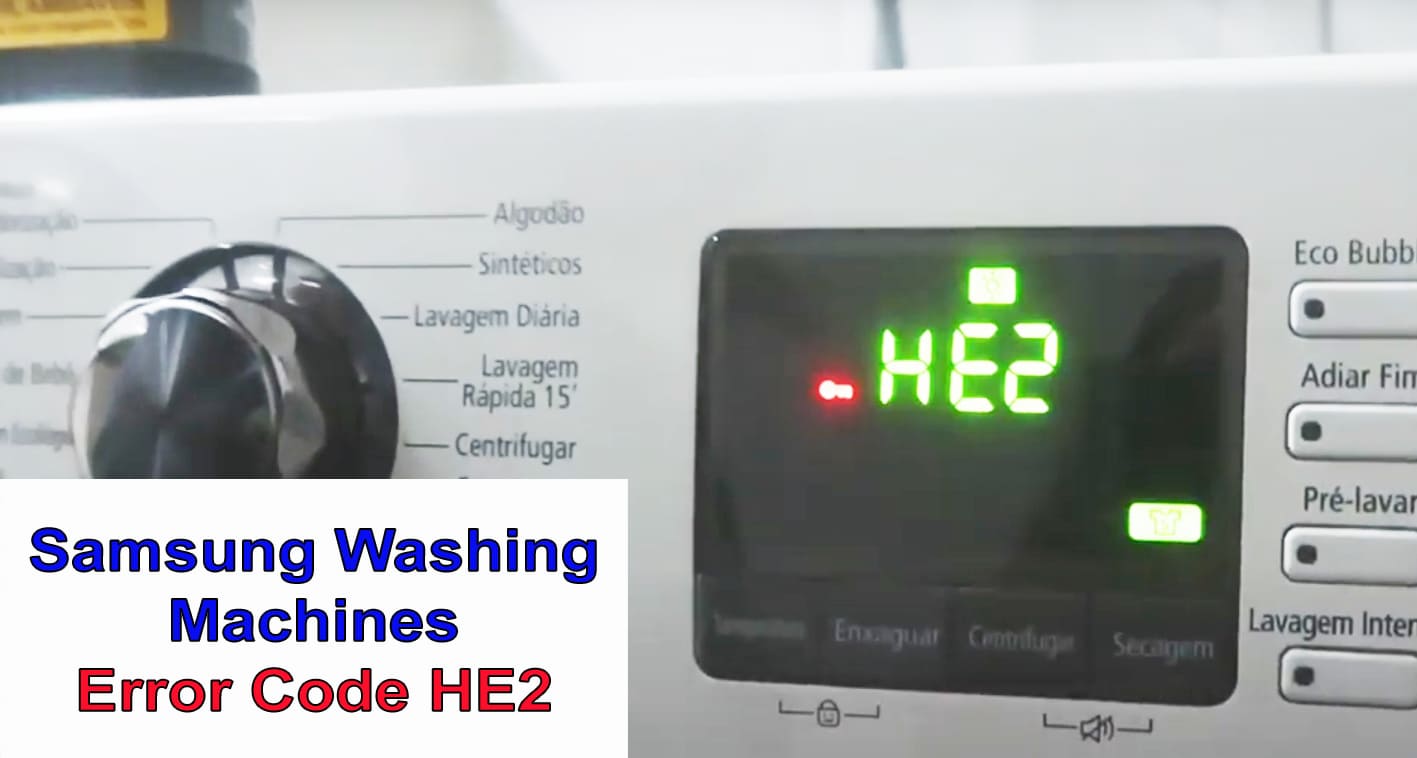
The modern Samsung washers have innovative heating elements with ceramic coating installed. And if you notice the HE2 Error code on the screen of your washing appliance, that means that something is wrong with the water heating system. The same problem is usually displayed by the H2 combination on the devices with a two-digit display.
For the machines without any screen, the Error is reflected by the blinking of all mode and temperature indicator lamps.
Combinations of symbols, which always start with “H” – H1, H2, HE, HE1, HE2, stand for HEating and always indicate that your device can not perform the appropriate heating of water, ie the temperature control sensor does not fulfill its purpose (water is not heated or has a very high temperature, which exceeds the set for a particular program individually). As a result, the device can only operate in cold water cycles.
All the above-mentioned codes are related to the heating system, but a point on dif-ferent issues, so you should be very careful when determining the problem.
What can cause the HE2 Error?
The HE2 Error means your water is heating too slow — it gets to not more than 2 degrees in 10 minutes. In most cases, the reason is in the malfunction of the main heating element. It may have burnt out because of the short circuit.
The Error can also be related to the failure of the temperature detector or a mal-function of the control board (whether a one-time or a more serious).
The same code can also we cause because of the wire connection breakage. The contacts can be loosened or burnt out.
How to fix the HE2 Error?
Please note that in most cases such type of a malfunction has to be eliminated only by professionals, specialists in the repair of washing machines. However, there are a few steps, which you can cope with on your own, to at least exclude the easiest reasons for the Error code occurrence.
First of all, switch the device off and unplug it from the main power. Check whether the machine is stable and placed evenly on the floor. If not — the extra vibration can cause different malfunctions and provoke the error codes displaying on the control panel. So while your device is “resting”, check its legs and fix them if needed. Switch the machine back in 10 minutes and see whether the code is still on the display or not.
In order to determine the cause of the HE2 code appearance, you will have to dis-assemble the device and check both the control unit and the heating element. In the case of the main module, some contacts might have been burnt out or damaged and need to be replaced. Or, in the worst case, the whole unit will have to be changed. It is recommended to contact a professional repairman for the correct diagnostic.
To examine the heating element you need to find it first, and it is not the easiest job, as in Samsung devices it is placed in the front part of the tank, unlike other models, where it is connected to the back part and it only takes a removing of the back wall to get to it. So start with detaching the front-panel of your appliance. Loosen the control board fixers and unscrew the bolts near the cuvette. Before taking the panel off you have to eliminate the rubber gasket. Do not forget to place it back after.
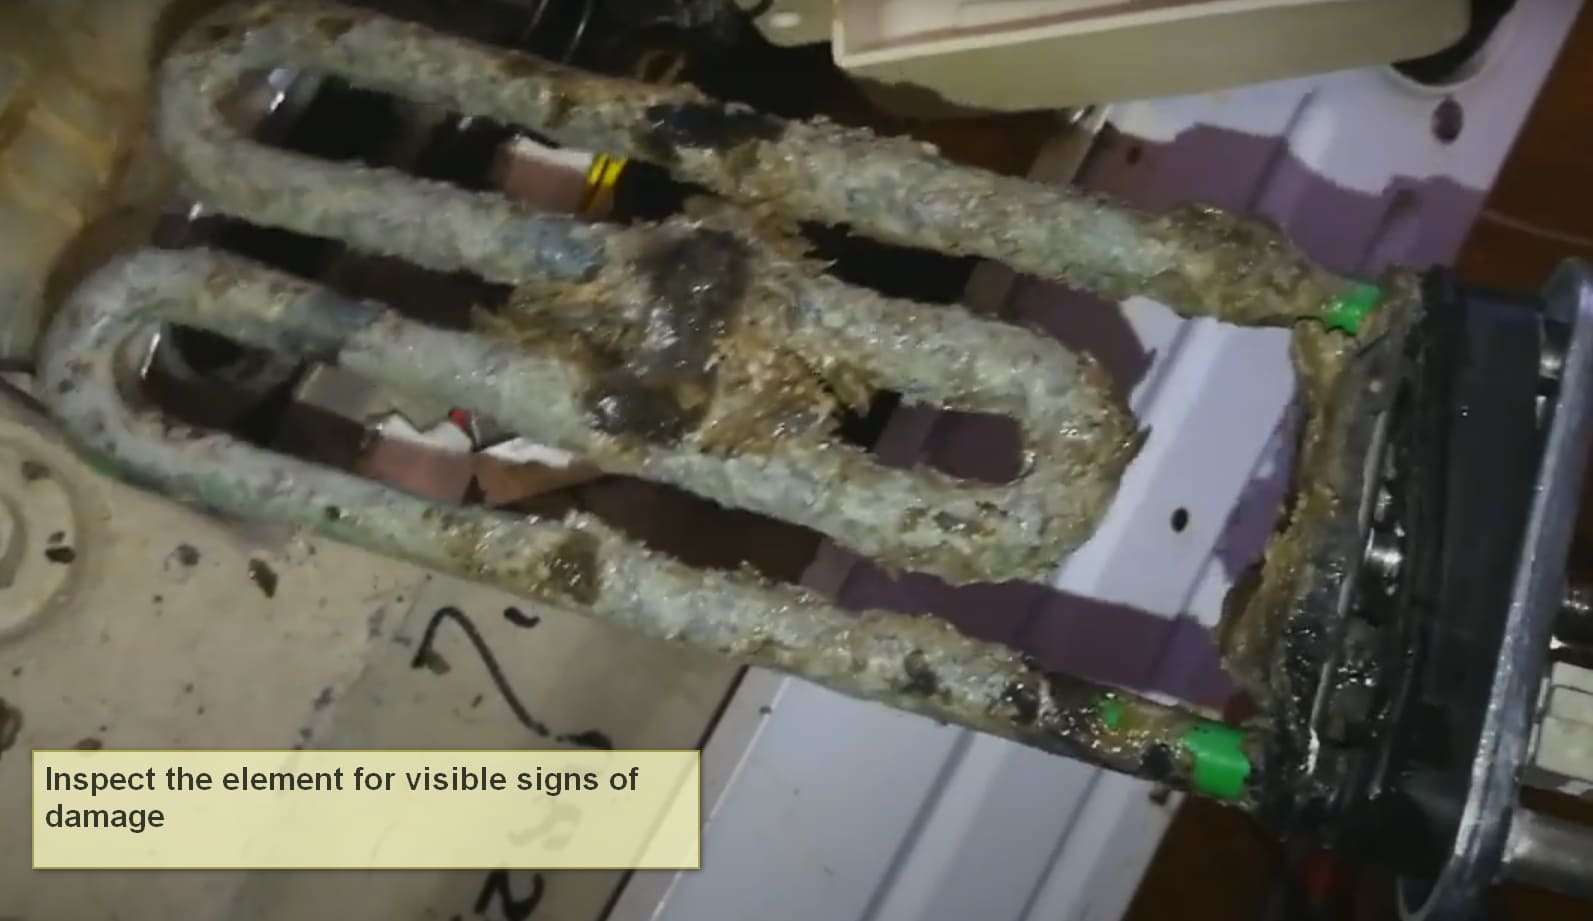
Now you can see the heating element and subtract it, but first take a picture, to re-member how it is connected to the device.
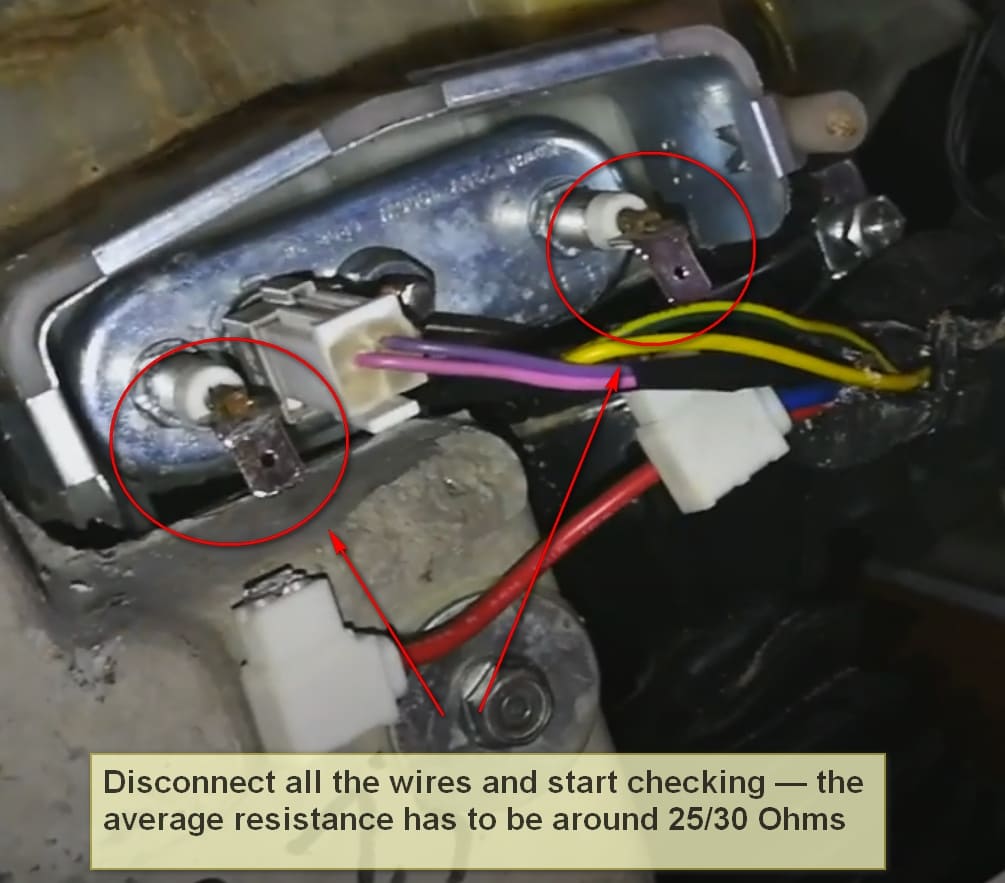
Inspect the element for visible signs of damage, then proceed with the multimeter. Disconnect all the wires and start checking — the average resistance has to be around 25/30 Ohms. If the resistance of your element is different — it has to be re-placed. If it is normal, then there is possibly an issue with the voltage, but here again, it is better to consult with a specialist.
To summarize, after your machine indicated the HE2 code, you have identified the cause of the failure (control unit or heating element), it is time to start repair work. If you feel confident enough — you can try to do it yourself.
If a heating element malfunction is detected, it must be replaced. Use the tools to unscrew and remove it properly and install a new component. Connect it and check that the unit is working properly. Don’t forget to take photos of every step while dis-assembling, it will make the installation process easier and will lower risk or incorrect wire connection.
The same error may also occur due to breakage in the connection wires. In this case, they must be replaced or fixed. Worst of all, if a control board fails — you may need to replace the entire unit.